


 I honestly have no VALENTINES DECORATIONS, totally sad right? I know. Anyway, I was looking around at my usual blog sites and came across a couple great ideas HERE and HERE, I decided to mix the two together and this is what I came up with:
Super Cute and Super Easy!!!
This is my very first TUTORIAL, so hopefully I don't mess anything up :)
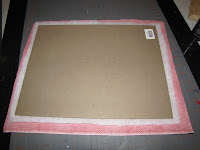
I started out by sanding and spray painting an old frame black. Since I wanted this to be for VALENTINES DAY I chose a red pin dot fabric and cut it 1 inch larger than the cardboard backing of the frame (make sense). My frame hangs, but if you have a frame with the easel that works too, just make sure to cover the side without the easel :) I then cut a piece of thin batting about a 1/2 inch bigger than the cardboard. You don't have to use the batting, I don't think it makes a difference really, i just wanted it to be a little poofy. Using spray adhesive I attached the batting to the cardboard and the fabric to the batting.

Starting with the middle on one side I folded the fabric over to give me a clean edge and then glued it down using my hot glue gun. Then I did the same for the opposite side and then the last 2 sides as well.

I Did the corners by folding the fabric and then gluing down the center and then folding and gluing the side flaps down.

I tore the cover off an old paperback book and cut the rough margin (from the spine) off and then cut the page into 2x2 squares. I printed a heart off using Word and traced it onto fusible interfacing, cut it own and then ironed it down to my fabric covered board.

Now for the FUN part ...

You all remember elementary school and making fabulous creations out of tissue paper and glue? Well, that's what you are going to do here, only with the book pages. I'm not gonna lie, it's rather time consuming, but totally worth it. I started by using white glue, but it wasn't drying fast enough so I switched over to my glue gun. One of those hot glue melting pots would have been FABULOUS to have but I don't have one :( Anyway, I started with the center and worked my way out to the edges. I chose to put mine fairly close together, but you don't have to and it will still look darling.

I'm thinking this could be great for a child's room, just use their initial and maybe some cute scrapbook paper and fabric that coordinates with their bedroom. Or super classy in an entry way with the initial of your last name and maybe a nice damask fabric.. OOH I think I'm going to do that next!!
I'm linked up to the two fabulous Valentine link Parties below ... Check 'em out!!!


Jessica,
ReplyDeleteLOVE it! And you did a fabulous job on your tutorial. Easy to follow. Thanks for sharing!
happy crafting,
Linda