Photobucket Photobucket Photobucket
*** Please excuse my terribly bland and awkward blog appearance. I'm working hard on making it look pretty . . . it's QUITE time consuming!! ***

Tuesday, May 25, 2010

Show Us What You're Workin' With #13!!

I have a super cute project for you today, it's one of my favorites that I've done in quite a while. Here we go ...


I started with this box that I got at the thrift store for $.99. The flowers are H-I-D-E-O-U-S but the box was in great shape and it was too good of a deal to pass up. It sat in my craft room for a few weeks because I didn't really know what I wanted to do with it. The one day it came to me!!! My dad had just made-over my closet and there was a box of sheetrock compound on the floor. I took the box to the craft room along with a putty knife and went to town.


I loaded up the knife and spread it on the box, right over the ugly flowers. I didn't take any closeups pics though ... I don't know why.


I didn't want a smooth look so I left the texture, just like you would if you were texturizing a wall.


For the front of the box I gooped the stuff on and then pressed the knife against it and then lifted it up *** does that make sense? *** It left these little peaks all over. Now the box was covered it has to dry for quite some time. I waited 2 days just to make sure, but just follow the instructions on the box. I took some sandpaper to the peaks on the front of the box just to make sure they weren't sharp and it left some nice texture. I painted the whole box with Antique White and let it dry completely.


Once the paint was dry I painted a brown glaze over each side and the front and then wiped it off with a damp rag.


I made sure to not wipe the glaze out of the divots and holes. I just kept wiping until I got the look I wanted.
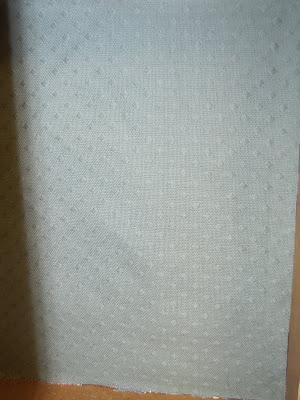


I didn't paint the inside of the box ... I totally forgot all about it :) So, I cut a piece of blue fabric that I had leftover from my jewelry holder, and glued it to the inside.


I used a bit more of that blue fabric, some burlap, and another fabric from the jewelry holder to make these 3 little rosettes and hot glued them to the corner of the box.


Here she is all finished and on a shelf in my closet. I am in love with the end result and for $.99 I love it even more!!

Now it's time to party!!!


Awesome Fabulous-ness from WYWW #12

Another week has FLOWN by ... which means its time for my favorites from last week!! And let me tell you, they are great!!! And I had more links this last week than ever before, you all rock!!!!


Alix, from Shadywood Chic, came up with this TOTALLY easy and BEYOND fabulous cabinet transformation. You need get over there and check it out!!


Ashley, from No Apologies, made this DARLING alphabet wall art!! Go check out how she did it!!!


I LOVE THIS ONE!!! I heart made this UBER-AWESOME canvas using paper from magazines!!

Sunday, May 23, 2010

I'm speechless ... and overwhelmed!!!


I have received 5 ... yes I said FIVE!!! Awards this past month!!!! I can't believe that you consider Me and My Bucket award-worthy ... Thank-You!! Thank-You!! Thank-You!!

All five of the ladies that presented me with these awards are FABULOUS and I LOVE reading their blogs and I hope you all will go check 'em out (If you don't already)


Meg, over at A Little Knick Knack, gave me the Versatile Blogger award!!!

Tammy, from Not Just Paper and Glue, gave me a Trendy Blog award!!


Miss Morgan at Meet Virginia, gave me this cute little award!!
And last but not least ... Jennie, from Cinnaberry Suite ...AND Pati at A Crafty Escape awarded me with The Gorgeous Blogger Award!!

Now I get to tell you some stuff about me ... Each award has it's own guidelines so I am combining them all together :)

10 Things about me ....

  1. I am right handed but for the life of me I can't snap with my right hand ... weird right?
  2. Lemons with salt are my favorite snack!! I know it's HORRIBLE for my teeth but I love 'em!! My mouth is watering just thinking about it :)
  3. I LOVE me a fountain Diet Coke ... seriously, it's the best. Out of a can is the second best but I will not drink Diet Coke from a bottle, it's nasty!! Unfortunately, my new healthier lifestyle doesn't allow much of the heavenly beverage. I have about 12 oz a week, if that :(
  4. As you may know, I'm an ARMY wife. It has taught me patience, strengthened my love for the hubs 100 fold, and taught me how to be independent all over again. He is at OCS right now and I miss him like CRAZY ... but only 35 more days!!
  5. I use to be a manager of a Pier 1 and as a result I have acquired way more placemats, napkins, throw pillows, dishes, curtains and other randomness than I will EVER need. SERIOUSLY!!
  6. This one is funny ... I have a naturally pinkish-red hue to my skin and I am constantly asked if I am sunburned ... even in the dead of winter. Funny huh?
  7. I love being barefoot and I pretty much only wear socks when I'm running or wearing boots. As a result, my heels are quite dry and I have to give them a lot of extra attention, especially during sandal season.
  8. I love to read and I will always finish a book, even if it is the most boring and lame thing I have ever read ... it's torturous but I just can't not finish it.
  9. I am TERRIFIED of birds ... all sorts, but especially chickens, ducks, swans and geese. The tiny birds outside aren't as bad because they don't really get up in your business like the big ones do but I still get the heebs when one flies by. I will NOT go in the bird exhibits at the zoo. Oh I have a funny story about birds ... Back in my Pier 1 days I worked at the store in Park City, UT. As you may know, SOME of the people that live there are rather uppity and think they own the universe ... ANYWAY, one of those said customers decided to bring in one of these
ARE YOU FREAKING KIDDING ME???!!! Uhhh no, I'm dead freaking serious!! Anyway, he had it on his arm like it was no big deal and it was making noise and flapping it's wings and I about number 2'd myself (sorry, for the image, but it was traumatizing) I literally ran to the stock room and was crying because I was so freaked out. I was shaking like a leaf and it was really bad. The guy was in there forever and it got to the point where I had to have someone ask him to leave because I had to be out front. He was totally understanding and even felt bad about it but I felt so ridiculous that I couldn't handle it.
10. Moose are my FAVORITE animal ... I'm seriously OBSESSED!! As a teenager I had a recurring dream that the man I would marry was with me when I saw my first live one and since then I just was obsessed. Before that I never thought twice about them. Weird right? And yes, the hubs was the one!!! I had other boyfriends who had taken me on drives up in the mountains trying to find one, but we never did.

10 Things I love ...

  1. The smell of Suavitel laundry softener ... it's the best!!
  2. When Bucket wakes up and just sits in his crib for a bit and talks to himself, I think it's so flippin' cute!!
  3. My yellow blanket that I've had since I was a baby, I sleep with it every night. And yes I'm almost 27!! June 5th to be exact ;)
  4. White Tulips
  5. Coconut and anything with it in it. I use to eat it with a spoon right out of the bag :)
  6. Lady Gaga and her music. Yeah, she's a freak show but she is mad talented.
  7. Sushi!! The hubs hates it, so I don't get it as often as I would like. I literally ate way too much of it immediately after Bucket was born. I'm dead serious, I had been telling Phil for months that I wanted it right away and he made sure it happened.
  8. Victoria Beckham's perfume, Intimately Beckham, it's FABULOUS!!! I also like her hubs, ain't he great to look at??!! Unfortunately, once he opens his mouth he loses a bit of that sex appeal ... have you heard is voice? He sounds like a chick!! LOL
  9. Taking Baths
  10. My FABULOUSLY AWESOME readers!!!
5 Things I don't like ...

  1. When people drive slow, or I should say the speed limit, in the fast lane ... it's horrible!!
  2. That I know what time it is by what show is on Nick Jr. NO, I don't let Bucket watch TV all day long, but it is usually on because I like the noise.
  3. That I worry way too much.
  4. Phil driving his Harley on the freeway and if he isn't wearing a helmet it is STRICTLY forbidden!!
  5. Cold weather!! Why do I live in Utah, you ask? That's a great question!! I would love to never spend another winter here for as long as I live.
Ok, that was tough!!! Now you all know some totally useless crap about me!!! FUN RIGHT??!! Onto the fun part ... I'm passing any one of these one to the following ladies. You can take all 4 or choose your favorite!!

Rachel @ Holy Craft
Jessica @ Live it. Love it. Craft it.
Margo @ Blue Family Scene
Ashley @ Cute as a Fox
Kimmie @ I Live Fancy
Tracy @ Tracy's Trinkets and Treasures
Nicholette and Vanessa @ Craft Envy
Mary @ Lil Bit Of Us
A Little Lovely *** So sorry, but I don't know your first name ... I couldn't find it anywhere on your blog***
Becca @ Bare Feet on the Dashboard
Lynette @ My Craft Discovery
Cheryl @ Artsy Fartsy
Kelli @ Whimsi Kel
Nicole @ House of Huddleston

You know what?? I just decided that you all are so fabulous that I want to give you all this ...


So, take it and pass it along to 10 friends and post 10 things that make you happy!!

Tuesday, May 18, 2010

Show Us What You're Workin' With Wednesday #12

Hey all!!! I hope you are having a FABULOUS week so far. Sorry for the lack of posting, but the flu circled around this house and it wasn't pretty. So, needless to say, I wasn't really up for any crafting :(

But, now I am healed and ready to party!!! Tammy, from Not Just Paper and Glue, is guest hosting for us today. You are going to LOVE what she has to show us!!! Tammy ... take it away!!


Hi! Tammy from Not Just Paper and Glue here – guest blogging for Jessica. I am going to be showing you this fun little tutorial on how to create a bucket from a lampshade.

A few years ago we purchased a rustic chandelier and it came with two different types of lampshades. I saved the unused lampshades because I never know when I might be able to use something for another project. Besides, that is what every crafty mom does, right? Save and repurpose everything!

To make your Lampshade Bucket you will need:
Lampshade
Foam Board or Heavy Cardboard
Heavy Wire Cutters
Glue
Spray Paint
Felt (optional)
Embellishments

You will want to start with a lampshade that has a nice cone shape to it similar to this one. If your lampshade is new, then remove the plastic wrapper from the shade. If it is used, make sure it is free from dust, dirt, and debris.
1
With a pair of heavy wire cutters, remove the pieces that holds the lampshade to the lamp. To do this, I used my wire cutters to cut as close to the edge of the shade as possible then I used a pair of pliers to gently break off the extra pieces so it was flush with the edge of the shade. If you cannot get the extra pieces to come off, then just make sure that each wire stem is cut as close to the shade as possible.

2 3
Now it is time to apply the base color. I chose Warm Yellow from Rust-oleum. It says that it is a gloss spray paint, but I don’t think it will matter what finish the paint is because they will automatically turn mat because of the fabric. I sprayed the outside and inside of my lampshade.
NOTE: Make sure you use the spray paint according to the manufacturer’s specification and use in a well ventilated area (outside is best).

4
Once the paint has dried on your lampshade, turn it upside down onto a piece of foam board and trace. You will then cut out the circle from the foam board. Check to make sure it will fit snug into the bottom of your lampshade. You may have to trim your circle to get it to fit nicely.

5
Once your circle is the correct size for the bottom of your lampshade you can glue a piece of felt to one side. This is optional, depending upon how you are going to be using the bucket.

6 7
Next, run a bead of glue (I am using Helmar Craft Glue) around the inside edge of the lampshade bottom then place your circle into the lampshade to form a bottom to what is now your bucket ☺ Let this sit to dry completely.
8 9
To finish (my white foam board was showing), I spray painted the bottom of my bucket. If you choose not to use felt on the inside bottom of your bucket, then you could actually wait until you had your bucket completely assembled then spray paint all at once.

10
Once the bottom of your bucket is dry, embellish as you desire. I chose to cut images from some leftover scrapbook paper and glued them on using my Helmar Craft Glue. I then added some letter stickers and P K Glitz glitter for a little added sparkle on my images.

11 12

So there you have it! Now, lets see what you can create with a lampshade ☺

OH MY GOSH!!! Isn't that such a creative little use for a cheap lampshade??!? That is so great!! Thanks Tammy!!! Now, let's see what you have to show us ... PARTY TIME!!!


Tuesday, May 11, 2010

Top 3 From WYWW #10

Ok, I know I've been a slacker with the Top 3 lately ... I have no excuses!! FORGIVE ME??!! I PROMISE it will NEVER happen again!!

It's getting harder and harder to only choose 3, I'm going to have to make the list MUCH bigger!!! That's totally Awesome!!!

So, with that being said ... let's get down to it!!!


Check out these beauties from A Little Lovely. So simple, yet so Custom looking!! I LOVE IT!!!!


Miss Morgan form, Meet Virginia, made some SUPER-DUPER cute O-Scarves. I need to get to the fabric store and pick up some fabric so I can make some of these cuties!!!


Kelli, from Whimsi Kel, made this FABULOUS circle ruffle pillow!! Sooo awesome!! Check out the other pillows she has made!!!

Thank-You!! Thank-You!! Thank-You!! For your submissions, can't wait to see what you come up with this week!!!!

Girls, feel free to grab my I've been featured button!!

Show Us What You're Workin' With Wednesday #11

Welcome to another Show Us What You're Workin' With Wednesday!! I am so thrilled by how this little ole blog of mine is growing and I have ALL of you to thank for it!!! Seriously, you are fabulous!! I had 75 entries last week and it grows a bit more every week.

Ok, on to my project for today ... My cousin gave me a pair of Aeropostale sweat pants that didn't fit her anymore. They fit me perfectly, BUT they were WAY too short. They are super comfortable so I decided to cut them off into capris. I just took the scissors to 'em and they are still comfy and great to wear around the house or to go for a run.

Anyway, after I cut the bottoms off I didn't want to just throw the scraps away, so I came up with this!!!


Uh yeah, I have absolutely NO makeup on in this picture so I cropped it down as much as I could, but unfortunately you can still see my face!!! But, isn't this little headband just the cutest ever?? And it was SOOO easy!!!


So, these are the cutoff pieces before I cut them up even more.


This decorative stitching ran along one side of the pant leg.


I cut up on both sides of the decorative stitching leaving me one long piece. *** I kept the decorative stitching piece, you will see later what I did with it ***


I cut 6 strips, about 3/4" wide, along the length of the the fabric.


I stacked up all 6 strips and stitched through all of them with a needle and thread.


I braided the strips together and ended up with this chunky braid. I know the middle is kinda ugly, but don't worry, I will cover it up later.


I cut two 1 1/2" strips the length of the fabric, and cut one of them in half at the seam. Following Amanda's tutorial, from Imperfectly Beautiful, I made 3 rosettes. 1 Large and 2 small.


After the rosettes were done I thought they looked a bit too plain, so I added some beads to the center of each of them with hot glue. You could stitch them down if you want, but I was tired and it was late, so hot glue it was :)


Before I attached the rosettes to the headband I stitched the two ends together and wrapped a piece of the decorative stitching piece, that I cut earlier, around to hide the stitches. Now my headband was ready.


I used the hot glue gun to attach the rosettes to the braid and VOILA!!! Super easy and free since I already had the beads!!

Oh I should probably tell you ... I have a very LARGE head so this headband fits me perfectly. You may want to measure your head before you start cutting, to make sure that it is going to not be too big or too small. And remember that there is SOME stretch to the material.

I really how this turned out, did I already say that??!! I can't wait to wear it out somewhere!!

I need to let you know where I'm linking this little girl up!!!

Creations by Kara


 http://www.thethriftyhome.com


Show and Tell Green


Now, LET'S PARTY!!!!