Sunday, February 28, 2010
CHALKBOARD COASTERS GIVEAWAY!!
Aimee Grove said...
Hello. Heard about you through Someday Crafts... When I saw these coasters featured I was all-I got to learn how to make those. weird thing but I'm addicted to coasters-I think I have 3x the amount of coasters than glasses in my house.
OMG I hope I win but if I don't I am most def. making these.
thanks :)
Aimee
YAY AIMEE!!! I just sent you an email and I will mail them, and you super fabulous EXTRA gift out as soon as I get your address. THANKS!!
Don't worry if you didn't win, I'm putting another giveaway together for later this week or next!!
Wednesday, February 24, 2010
Show us what you're workin' with Wednesday!!
My first party will be next Wednesday March, 3rd. and I am COMPLETELY prepared to have only 1 link, my own, but that's ok!! I can only hope that this grows and reaches out to all the lovelies in Bloggy-land.
Ok, for right now I've decided to not have any limitations to what you link up, as long as YOU created/made it. SERIOUSLY ... a recipe, a handmade card, a remodel, thrift store drab-to-fab, a table setting ... whatever you want. There may come a day when I will narrow down the options, but I will let you know when/if that happens.
I even created the button all by myself!! It was actually SUPAH-DUPAH easy, I'm not kidding. Here it is:

What do you think? Not too shabby for a newbie right? Ok ladies, help me spread the word and be back here on the 3rd for Show us what you're workin' with Wednesday!!
NERVOUS BREAKDOWN
Tuesday, February 23, 2010
Burlap Silhouette Throw Pillows

We've all seen the AWESOME hand cut silhouettes and we all know that they aren't cheap and it isn't like there are people that cut them on every corner. So, I decided to give it a go all by myself. I did one of Bucket and it's now in his room, that he doesn't even sleep in, but that's not what this post is about. I recently re-vamped our bedroom a bit and decided I needed some throw pillows. I got the gears a-turnin' and thought it would be cute to make them with mine and my husbands silhouettes on them. And that way when I make the bed I would put the one with his face on his side of the bed and mine on my side. TOTALLY FABULOUS right??!! Yeah, I was pretty excited about it. Ok, so let's get to it.
First thing I had to do was take the silhouette shots of me and the hubs. Let me say that was a CHORE!! Mostly because I couldn't keep a straight face for the life of me, and that I absolutely HATED each one we took. Normally I would choose to just print the silhouettes off with the printer, but I was out of ink so I just went with the next best thing. I got out my freezer paper and taped 'er up to the computer screen and traced it with a sharpie, just make sure you write on the paper side and not the shiny side.
Using the same tape I just used, I taped the paper down to my cutting mat. Then cut it out with an exacto knife. Be careful to stay on the line and not tear the paper since this will be your stencil. Put it aside, they will come into play in a minute.
I only had 20 inch pillow forms, and since I wanted to keep the cost down it was going to have to work. That being said, I would have liked to use a bit smaller next time. Adding 1 inch for seam allowance on 2 sides and 1 1/2" for the other 2 sides *** YOU WILL SEE WHY IN A MINUTE *** I cut the Burlap at 21" x 21 1/2", 2 pieces per pillow. This was my first time working with Burlap, I'm a late bloomer I know, so I measured it 15 3 times before I cut it :).
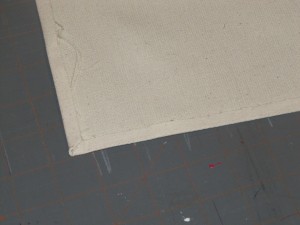
I originally was going to stencil right on the burlap but I decided I wanted more of a contrast, so I dug out some canvas from the fabric stash and cut (2) 12 inch squares. Then using my iron I folded and ironed under 1/2" to make sure I had clean edges.
Center your image stencil on the canvas and iron it, shiny side down, with a HOT iron. *** The freezer paper box has the instructions, so don't worry you can't mess it up. ***
I chose a blue-ish paint that compliments the accents in the bedroom and using my stenciling brush I dry brushed (dabbed most of the paint off leaving a tiny amount on the brush) the paint on. I did the outline first, then worked towards the center.
Since I didn't use a lot of paint, it dried very quickly. I pulled the stencil off and this is what I was left with. I wasn't totally happy with the way my mouth and chin looked so, using a fine paintbrush I added a bit to the lips to offset the chin ... heehee :) I swear I don't have Jay Leno chin!!
Now it's time to pin and sew the canvas down. *** MAKE SURE THE 21 1/2 INCHES ARE RUNNING LONG WAYS AND THE 21 INCHES IS LEFT TO RIGHT *** Pin the canvas 5" from the bottom and 5" from each side. You will have 5 1/2 inches from the top.
Sew the canvas to the burlap using a 1/4" seam, being sure to back-stitch at the beginning and the end.
Now it's time to close 'er up. Put the other piece of burlap on top of the piece you just finished, once again remembering to pin all around the edges. Sew a 1/2" seam on 3 sides, back-stitching at the beginning and end. Then do a zig zag stitch to help keep the burlap from unraveling, you could also use a serger if you have one.
Snip the corners and then turn right-side out. Use a pencil, scissors or some other skinny-ish tool to push the corners out. Put your pillow form in your new case to make sure everything fits nice and tight. Take the form out and get ready for some more ironing and sewing.
Now it's time to fold and hem the opening. Fold over 1/2" and iron, then fold it over one more 1/2" and iron again. Using a straight stitch sew a 1/4" seam all around the opening. Cut (10) 6 inch pieces of ribbon that coordinate with your pillow and burn the ends with a lighter or use fray check to help keep them from fraying. Find the center of your opening and pin one piece to the front and one piece to the back. Then do the same 1" from both sides. Then once more, on each side, in the middle of the side and the original center. HOPE THAT'S NOT TOO CONFUSING. Make sure they all line up and then sew them down, going back and forth a few times to ensure they don't come loose. Put your pillow form back in and tie the ribbons.
I opted to just tie the ribbons in a knot because I like the look better than a bow, but you can do whatever you like. I also chose to add a little bow to my hair to tie the ribbon back into the pillow.
And a little bow tie for the hubs, I think it's cute :)
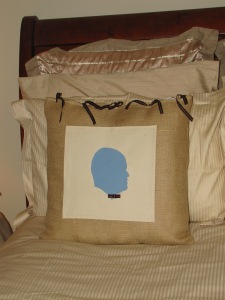
Here they are on the bed. I LOVE the punch of blue against the neutrals in the pillows behind it.
Let's get to the price:
I used about 1 1/2 yrds of Burlap and it was $2.99 yard with my 40% off coupon
I already had the ribbon, paint, canvas and pillow forms so BOTH of these beauties were less than $5.00. YAY!!! Personalized, custom made throw pillows for practically free, I LOVE LOVE LOVE practically free!!
I hope you like my newest idea, PLEASE DON'T HESITATE TO ASK IF YOU HAVE ANY QUESTIONS!!

OH AND YOU KNOW I HAVE TO LINK UP TO MY PARTIES ... THANKS LADIES!!
Can it be??
Sunday, February 21, 2010
Chalkboard Coasters & a GIVEAWAY!!!
*** I'VE DECIDED IT WOULD BE FUN TO DO A LITTLE GIVEAWAY!! I'VE LINKED THIS PROJECT UP TO MY FAVORITE SITES AND ONE OF YOU LUCKY GALS WILL WIN THIS SET OF 4 COASTERS!! ALL YOU HAVE TO DO IS LEAVE A COMMENT ON THIS POST AND ON SUNDAY 2/28 AT MIDNIGHT I WILL CHOOSE A WINNER!!! TELL YOUR FRIENDS :) ***
**** DUE TO THE TECHNICAL DIFFICULTIES WITH WORDPRESS :( I'VE DECIDED TO GIVE YOU A CHANCE FOR A SECOND ENTRY, ALL YOU HAVE TO DO IS BECOME A FOLLOWER. AND TO MAKE IT EVEN SWEETER I WILL THROW IN A LITTLE SOMETHING EXTRA TO THE LUCKY WINNER!!! ****
I'm not gonna lie ... I LOVE HOME DEPOT!! Ever since I started this blog I honestly love going there. I will say it's sort of empowering being one of the FEW ladies in there. Yes, I still have to ask some questions, but for the most part I know where the ESSENTIALS are and I totally DIG it!! Anyway, I was there the other day and I decided to finally jump on the chalkboard craze and by myself a can of the magical stuff (I really do consider it magical). So many different applications for it were running through my head and one of the quickest and cheapest was chalkboard coasters. I thought they could serve a few purposes ... obviously the most important function is to prevent water rings on your coffee table and other surfaces, but I also thought they would be RAD as funky Place Cards (MY FAVORITE FUNCTION). And then the party guest could take it home after ... SO 3 TOTALLY PRACTICAL AND TOTALLY FAB FUNCTIONS!!! Oh, my hearts a flutter just thinking about these beauties. Ok, now for the supah dupah easy tute ...
*** Oh first let me say that I am missing 2 of the "during process" pictures. Luckily, they aren't crucial but it's still rather annoying!! ***
SUPPLIES
- Cheap-o ceramic tiles from the Depot $.16/each
- ChalkBoard paint, I got plain black but you can get it tinted to a variety of colors ... I'm trying that next!!
- Large paintbrush
- Glossy Accents or Diamond Glaze, I use Glossy Accents only because it's all I can find in the stores
- Acrylic Paints, in color(S) of your choice
- Patterned scrapbook paper or some other printed image/design you like
- Sticky back stiff black felt or plain black felt will work too
The supply list is super small and SUPER cheap. The only investment ($11.00) is the paint and it will last forEVAH!! Ok grills, let's do this!!

Bead Board Plaque With Hooks and Wreath
Let's start with the supplies:
- Bead Board from the Depot, you can get it at Lowe's but it's cheaper at the Depot. It's $9.95
- 1 x 3. Make sure you get the straightest one you can find. I had to dig through a bunch before I found the best one.
- Paint, in whatever color you choose.
- Sand paper
- Decorative knob
- 3 single hooks
- Miter saw or Miter box
I wanted to make my plaque 2 feet square and the bead board comes in 7 inch x 32 inch pieces. I used 3 pieces and cut each of them down to 21 inches long with my miter saw. The pieces have tongue and grooves on the edges so they slide together easily. Now I have a square that is 21 inches on each side
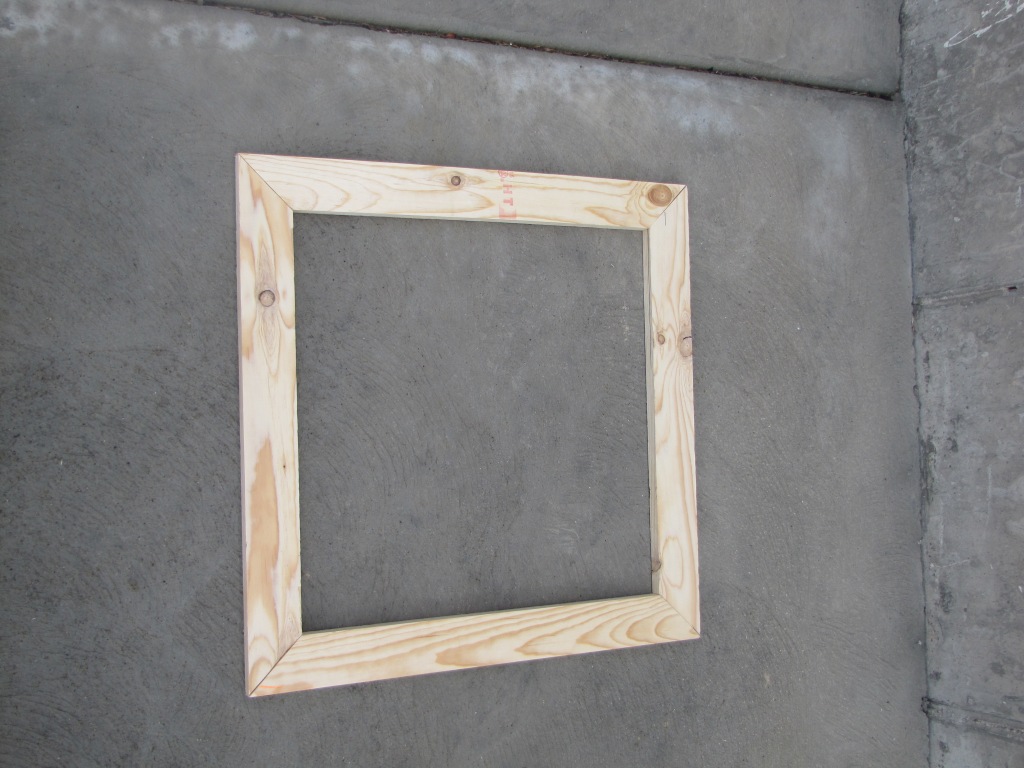
Now it's time to cut the 1 x 3. Using the miter saw again I cut a 45 degree angle every 24 inches. You need 4 pieces so do this 4 times and make sure that you cut the angle on the other end the opposite way of the first cut. I used a miter saw, but a miter box will do the trick and is less than $10 at the Depot. My drawing isn't perfect, but hopefully it gives you a better idea than my explanation.
Before you assemble the frame, lay the boards out to make sure the corners fit tight. Doing it this way will save you some headache if you realize the corners are wrong after its all nailed and glued together.
**** This next step isn't necessary and I will tell you later how to finish this without doing it this way. BUT since my dad is a contractor and he was guiding me through this, he INSISTED that I do it the CORRECT way ****
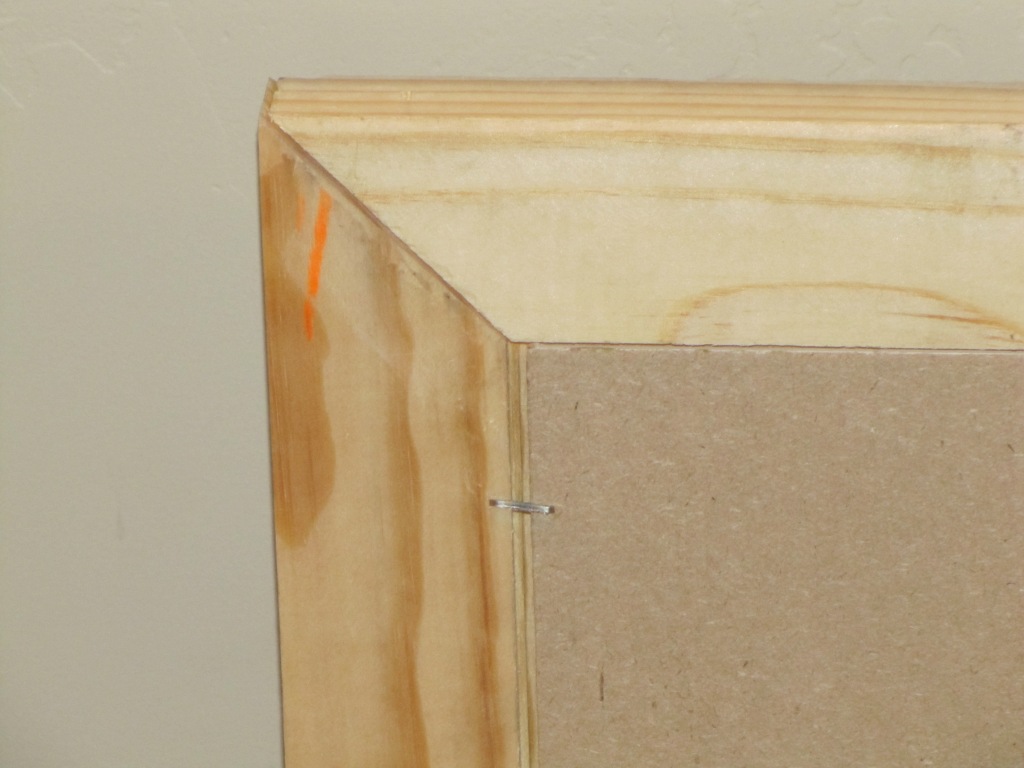
The step I am going to show you is called Mortise. I used the table saw to do it and it was actually SUPER easy. Mortise is cutting a notch out of the frame so that the bead board sits in the frame and it will hang flush against the wall. I'm sure its do-able without a table saw, but I have no idea how to do it, so I would suggest googling it :)
Sorry for the blurry pic, put it shows you the Mortise cut. Here's how you do it: First you measure the thickness of your bead board and that's how deep you will cut into the boards. My bead board is 1/4" inch and since I want the square to be 24" I cut 3/4" the other way. Now that the Mortise is cut it's time to assemble.
**** IF YOU CHOOSE TO NOT DO THE MORTISE YOU WILL ASSEMBLE THE FRAME ACCORDING TO THE DIRECTIONS BELOW AND THEN JUST STAPLE THE BEAD BOARD RIGHT TO THE BACK OF THE FRAME ****
I used a bit of wood glue to attach the corners then shot a nail on each side using my electric nail gun. If you don't have a nail gun, finishing nails and a hammer would work great. Now it's time to let the glue dry. Normally I would wait an hour or so but since my dad was overseeing, and we were doing it correctly, I let 'er dry over night. I was so excited to wake up the next morning and finish it!!
Attaching the bead board to the frame was super easy. I chose not to use glue so the wood could expand and retract if necessary with weather changes or whatever. I used the electric staple gun, SOOO much easier than the old fashioned staple guns, and stuck a few staples in her and called it good. I used some wood filler on one of the corners and to fill in the nail holes.
Now it's time to paint her up!! I used a flat black spray paint and once it was dry, I took my sand paper to the edges to show the wood and then sprayed a matte finish to seal everything in. I attached the hooks on the bottom using the screws they came with. I think this would be just as cute without them though, and it would save you about $6.00!!
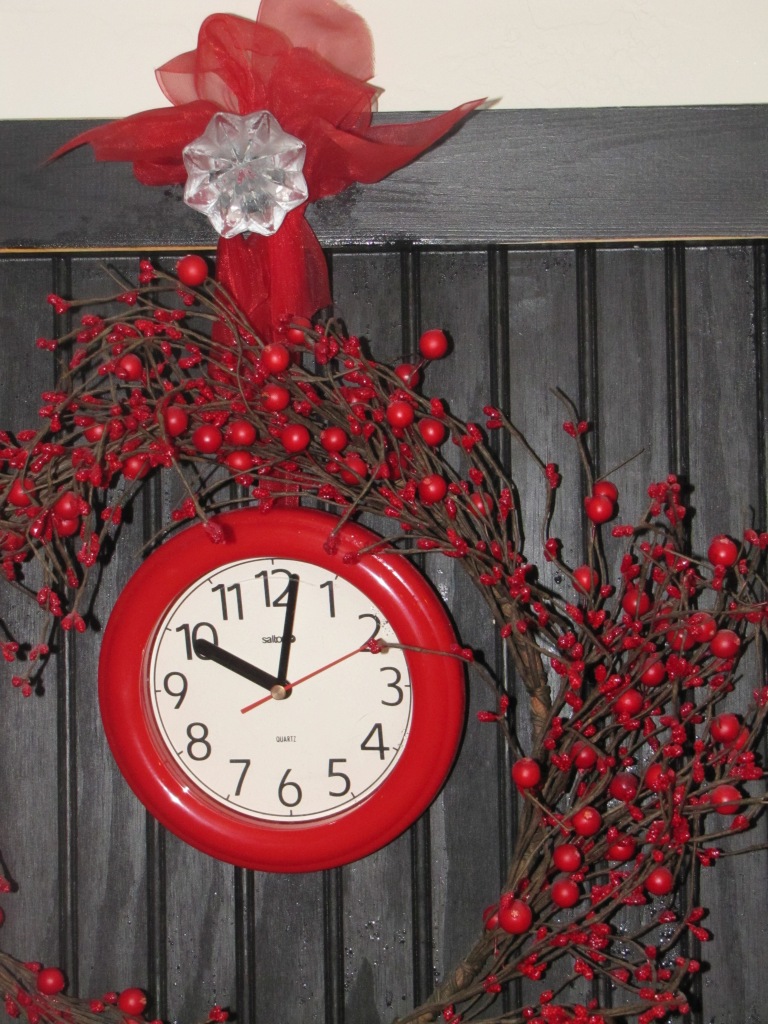
Here is a closeup shot of the knob and wreath ... I LOVE THE KNOB!!
Ok ladies, she's all done and from start to finish (not counting drying time) she took me about an hour. And the price is even better ... you ready??!!
$9.95 for the bead board
$6.00 for the hooks
$2.00 for the 1 x 3
$3.00 clock
Wreath, free since I already had it
Paint and sand paper free, already had them
FOR A GRAND TOTAL OF (DRUMROLL PLEASE) .... $20.95!!!! woo-hoo!! And remember that without the hooks it would only be $15.00 DANG I LOVE CHEAP STUFF THAT LOOKS TONS MORE EXPENSIVE!!!!!
And you know that I'm linking this up to my favorite parties ...


