Photobucket Photobucket Photobucket
*** Please excuse my terribly bland and awkward blog appearance. I'm working hard on making it look pretty . . . it's QUITE time consuming!! ***
Showing posts with label Decorating. Show all posts

Thursday, July 29, 2010

Tufted Button Wall Art


Here is my version of a simple and easy tufted wall art. I spent nothing on it, since I already had EVERYTHING on had, don't you love when that happens??!!!


I know, this pic is kinda crappy, but I want to keep the "whole view" picture til the very end!!! haha, ok, let's get down to it ... I started with 2 pieces of leftover shelving from the closet makeover. They were already cut and the perfect size so I didn't have to do anything, AWESOME!!! Miss Morgan, over at Meet Virginia, made some tufted art too, but she used a thrifted canvas. Anything will work, you could probably even use thick cardboard or foam board. Seriously, the cheaper the better!!!


I laid some batting on the wrong side of the fabric I was using and cut them both to the SAME size. The thicker the batting, the deeper your tuft will be. *** I did this so when I attach the fabric to the back of the wood there will be a bit of a cushion, so the wood and staples wouldn't scratch the wall *** I centered the wood on the batting and used my staple gun to attach the fabric/batting to the back. Do the center of the edges first then do the corners. Fold the edges under so it gives you a clean and crisp hem. *** don't know why, but I can't find the picture of this step ... it's pretty self explanatory though, but let me know if you have questions ***


You'll end up with something like this.

Now it's time to make the "tufts" ...


Before you do anything you'll need to decide where you want the tufts to be. Just measure them out and mark them. I used a pen mark, they will be covered up so don't worry about it showing :) Once again I used the staple gun to make the "tufts". It worked like a champ and was super easy.


Here is a pic of all the tufts. Now it's time to make the "buttons" to cover up the staples.


I used these large thumb tacks that are for quilting frames. You could also use buttons, or button covers. I already had the tacks so I just made do :) I hot glued the pin head to a scrap of coordinating fabric. You'll want to trim the fabric down to a circle, leaving just enough to wrap under. I used a bit of hot glue to adhere to the underside.

This is what I ended up with and I used a pair of wire cutters to snip off the pointy part.


Here are my faux buttons all ready to go. This pic is totally unnecessary, but I like the way it looks. haha


Hot glue the "buttons" over the staples. These tacks covered the staples perfectly!!! You can see that I only have a slight tuft, but remember that the thicker the batting, the deeper the tuft.


That's it!!! Here they are above our bed. Cute right? The hubs LOVED them!! It was the first thing that he said when he walked into the room. :) Every morning, when I make my bed, I look at my silhouette pillows and fall deeper in love with them!! Seriously!! If you missed those, check out how I did it here.


Tuesday, April 6, 2010

Show Us What You're Workin' With Wednesday #6!!

Once again, another Wednesday is upon me ... and once again I'm wondering where the last week went!! I'm excited to show you my little project for today!! It is very inexpensive and very easy, here it is:


I picked these cuties up at Dollar Tree, as soon as I saw them I knew EXACTLY what I was going to do with them. The only other supplies needed are:

Paint
2 x 4 cut into squares, 1 for each frame
Wooden dowels

You don't need many supplies and if you are like me and have everything on hand, except for the frames, you are going to make all 3 of these for only $3!!!


Cut your 2 x 4 into a square, sand all edges. A 2 x 4 isn't actually 4 inches (it's more like 3.5), so make sure you measure before you cut. Mark the center of each square and drill a hole about half way through, make sure you don't put the hole the entire way through. The size of your dowel will determine what width to make the hole, my dowels were about 1/3". After you drill the holes, be sure to sand the hole down a bit so it's smooth. My dowels came 6 in a package and were cut at 12". I chose to glue the dowels to the bases first so I could paint them easier. I used the glue gun and squirt a bunch of glue down in the hole and stuck the dowel in. Now it's time to paint the base and dowel in whichever color you choose.


Now it's time to get to work on the frames. The frames have those stands on the back so you can set it on a table, but I didn't want them or need them so I pulled them off. When I pulled the bar code stickers off the back it pulled off some of the cardboard, as you can see in the picture. GRRRR!!


Now, paint your frames and let them dry. The paint soaked into the wood a bit, so it made it look kinda weathered and old ... which I LOVED!! But, if you don't want that look, then put a few extra coats on it. Once the paint is dry, attach the dowel with more hot glue. I cut the dowel down to make the frame sit at the height that I wanted. Once the glue is dry, put a picture and the glass back in the frame. I turned the little cardboard insert around so the missing cardboard wasn't showing, you can see what I mean in the picture.


Here is the finished product!! I made these 2 for the bedroom. I made them different heights and added a bird from Dollar Tree that I painted and a bit of moss to look like a nest.


This one I made for the bathroom, it's my FAVORITE!!! I didn't put pictures in any of the frames, because at this moment I can't find all my pictures ... still haven't unpacked them. So, for now, cute scrapbook paper is going to have to do.

Didn't they turn out super cute??!!! I just sorta realized that I didn't take a lot of pictures of the "how-to" steps, hopefully I explained it well enough, but if I didn't and you have any questions, please let me know!!

I liked the way these turned out so much, that I've decided to link up to these parties:

Photobucket


Make it Yours @ My Backyard Eden


Ok, now on to the PARTY!!!


Friday, April 2, 2010

Vamp up your Lamp-shades!!

I am doing my first Guest Post ever on Wednesday over at Life as Lori. I'm soooo excited!! This is the project I am showcasing ... let me know what you think!!


I took these plain and boring lamps and JAZZED 'em up by embellishing the boring off-white shade!! I got both of the table lamps and a floor lamp for $14.99 at TARGET, pretty sweet right? I've been using them for a month or so and I just couldn't get over how stinkin' boring the shades were. Then just the other day the idea popped into my head to paint them a bit. Ok, its super easy, here we go!!


First, I had to decide which words I wanted to use, and which language as well. I figured that since they were for the bedroom I needed to use a romantic language, so I went with French and the words "tranquility" and "serenity". I downloaded a font by Jellyka Nervan called Gare de Chambord from Dafont ... if you've never been there for fonts, go there after you read this :)

Since my shades are tapered and not drum, I cut the words up into smaller sections so I could arrange them in a straight line. I first tried without cutting them and due to the curve of the shade the word looked kinda arched, like a rainbow :) I taped them to the inside of the shade using scotch tape.


Turn the lamp on and trace your letters onto the shade with a FINE tipped paintbrush and whichever color paint you would like. I went with black for these. I didn't want the lines to look perfect, I kinda was going for an oldish look, so you don't have to worry too much about a super steady hand.


Once you've got the word painted on, take the paper off and let it dry. Once the paint is dry you will be able to see if you need to add another coat of paint. The more coats you add, the darker and opaque the letters will be. *** I have NO clue how to type the letters in WORD with the accents and things over them, so I just free handed them on, I know this picture doesn't show it, but I didn't want you to think I forgot about it ***


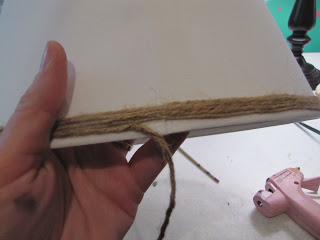
My original plan was to do a tea-stain treatment to the shades to darken them up a bit, but turns out I REALLY liked the look of the black against the off white shade. But, I still wanted to jazz it up a bit so I wrapped the top and bottom in jute twine. There was already a binding along both the top and the bottom, so I used that as a guide. I went through a lot of mini glue sticks and sustained a few minor burns, but I LOVE the way they turned out!!


This is the lamp on the Hubs' nightstand. His says "tranquility".


And, another shot of mine :) I LOVE LOVE LOVE how these turned out, so much better than I originally envisioned, and what a way to doll up some plain boring lampshades!!

Its been so long since I've linked up to my favorite parties, I've been so crazy busy with the move and Bucket's birthday and now Phil is leaving on Friday morning for 12 weeks. I'm not sure I've told you all, but he is in the ARMY so he is going to Georgia for OCS (Officer Candidate School). Anyway, check out all the fun places where I get my party on!! I am linking this specific project to the following parties:

Something I Whipped Up Monday @ The Girl Creative

Make Your Monday @ The Twice Remembered Cottage

Make It For Monday @ Cottage Insticts

The DIY Project Parade @ The DIY Showoff


Tuesday, March 9, 2010

Show Us What You're Workin' With Wednesday #2

First off let me apologize for being MIA this last week. We are in the process of moving, so I have been busy trying to get things organized so this move can be as smooth as possible. I have a lot of projects in my head so I PROMISE I won't leave you again :)

So, the time has come for my 2nd "Show Us What You're Workin' With Wednesday" party. I still can't believe how many of you FABULOUS darlings actually linked up ...23 TO BE EXACT!!! I am honored that you linked up and hope to have you back every week to come. I really want to feature a few of your projects and I will for sure get to that first thing tomorrow morning, but for now let's get to this weeks project ...


This SUPER cute, SUPER easy and SUPER-DUPER cheap t-lite chandelier. Ok, I've always wanted a cute little t-lite chandelier, but I've never wanted to spend $40 on one when I knew I could make one for tons less. I only ended up spending $3.00 for this because I had everything on hand except for the metal hoop. Now, for the tute:


I started with this 20" metal hoop from the craft store. They come in all sorts of sizes, how cute would a cluster of 3 smaller ones hung at different heights be??!?!!? OOOOHHH I'M SOOO DOING THAT!! I spray painted it white, do you think it's time for me to get a new piece of cardboard? YUCK, it looks so messy!!

I have a bunch of these little gems from my Pier 1 days. They are only $.50 each, so even if you aren't a crazy person like me and don't have a stockpile of them, you can buy them without breaking the bank.


I chose to use 8 holders for this chandelier, but you could always use less or more, whatever you like best!! The bottom of the t-lite holders aren't completely flat, there is a bit of a rim around the edges so to level it out I hot glued circles to the bottoms. I just used my hole punch, but if you don't have them you can just as easily trace the circles and then cut them out by hand.


Now it's time to glue the holders to the hoop. *** This picture was before I glued the circles to the bottom, but you get the idea. *** I turned the holders upside down and spaced them out evenly around the hoop. I just eyeballed it, I don't really have the patience to bust out the tape measure and make it perfect, but more power to ya if you want to measure.


I busted out my gorilla glue epoxy and glued these babies to the hoop. I used a scrap piece of wood to put over the top of the hoop once everything was glued and added some weight to help keep the connections tight between the t-lite holders and the hoop, while the glue dried. DOES THAT MAKE SENSE? I would have taken a picture of it, but my "weights" were Ghetto!!! Seriously, I used my sewing machine, my cricut, and an old licorice tub full of glass gems ... SOOOIF THAT'S NOT CLASS I DON'T KNOW WHAT IS!!! I let it dry over night.

After the glue was dry, I didn't like the "wet" look the glue still had so I cut out 8 more paper circles and glued them over the hoop. It looked a lot better this way anyway, because it covered the hoop too. Now it's time to add some ribbon!!


I actually had a tutu that I started making a while back and never finished, so I decided to use the ribbons and tulle from that to make this little beauty. I'm all for recycling and re-using stuff I already have around the house, and it cut down on production time since all the pieces were already cut. BUT, I'm sure that most of you don't have half finished tu-tus lying around, so cut the ribbon/tulle between 24" and 30" unless you want all the ribbons hanging at the same length. To attach the ribbons/tulle fold the piece in half and bring the ends up through the loop. You can always just tie them on if you like, I just happen to like the look of doing it the other way.


Keep tying the ribbons on until you get the desired look you want. Now cut 4 pieces of ribbon at about 32", these will be what you use to hang the chandelier. I spaced them out evenly, burned the ends and glued them onto the hoop. *** I took 2 inches of one side of the ribbon under the hoop and hot glued it to the longer side of the ribbon. *** You could also hand stitch it if you want, but this chandelier is very light and the hot glue does the trick for me.


I took the ends of the ribbons and tied them in a knot and hung her on the ceiling. Since you cut the ribbons at 32" you can choose to hang your chandy at a variety of heights leaving as much or as little of the ribbon tails hanging down as you like. Put some t-lites in, light 'em up and enjoy the pretty glow of your new chandelier!! Not too shabby for 3 bucks, right??!!

I'M THINKING ABOUT GIVING THIS AWAY AS A GIVEAWAY, WHAT DO YOU THINK? I HAVE NO WHERE TO HANG THIS SINCE I DON'T HAVE A LITTLE GIRL ... HAHA. LET ME KNOW!!


A FEW TIPS:

* Make sure to fray check or burn the ends of all your ribbons to help prevent fraying
* Make sure to not glue your hanging ribbons right next to a t-lite holder, you don't want to start a fire :)
* HAVE FUN and if you make one of these little darlins', let me know, I WANNA SEE!!!!

and you know I gotta show some linky love ... I'm attending these parties!!


OK, NOW ITS PARTY TIME!!! THANKS IN ADVANCE FOR JOINING ME THIS WEEK, I CAN'T WAIT TO SEE WHAT YOU'VE DONE!!!


Sunday, February 21, 2010

Bead Board Plaque With Hooks and Wreath

Ok girls, I'm super proud of this and I'm excited to show it to you. I have wanted to do something with bead board forEVAH and I finally did it!!. And the best part is that I made it all by myself!! Well, sort of, my dad did coach me along :)


THE FINISHED PRODUCT!!

Let's start with the supplies:

- Bead Board from the Depot, you can get it at Lowe's but it's cheaper at the Depot.  It's $9.95

- 1 x 3. Make sure you get the straightest one you can find.  I had to dig through a bunch before I found the best one.

- Paint, in whatever color you choose.

- Sand paper

- Decorative knob

- 3 single hooks

- Miter saw or Miter box


Bead Board all cut and ready

I wanted to make my plaque 2 feet square and the bead board comes in 7 inch x 32 inch pieces.  I used 3 pieces and cut each of them down to 21 inches long with my miter saw. The pieces have tongue and grooves on the edges so they slide together easily. Now I have a square that is 21 inches on each side


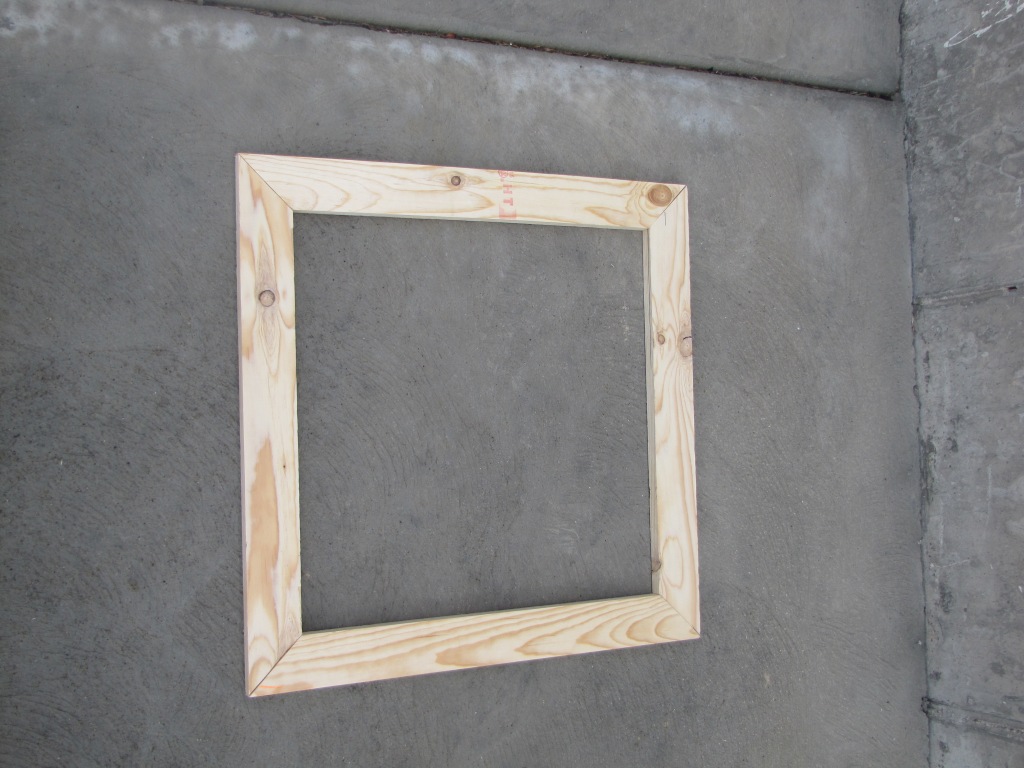
Now it's time to cut the 1 x 3.  Using the miter saw again I cut a 45 degree angle every 24 inches. You need 4 pieces so do this 4 times and make sure that you cut the angle on the other end the opposite way of the first cut. I used a miter saw, but a miter box will do the trick and is less than $10 at the Depot. My drawing isn't perfect, but hopefully it gives you a better idea than my explanation.

Before you assemble the frame, lay the boards out to make sure the corners fit tight. Doing it this way will save you some headache if you realize the corners are wrong after its all nailed and glued together.

**** This next step isn't necessary and I will tell you later how to finish this without doing it this way.  BUT since my dad is a contractor and he was guiding me through this, he INSISTED that I do it the CORRECT way ****

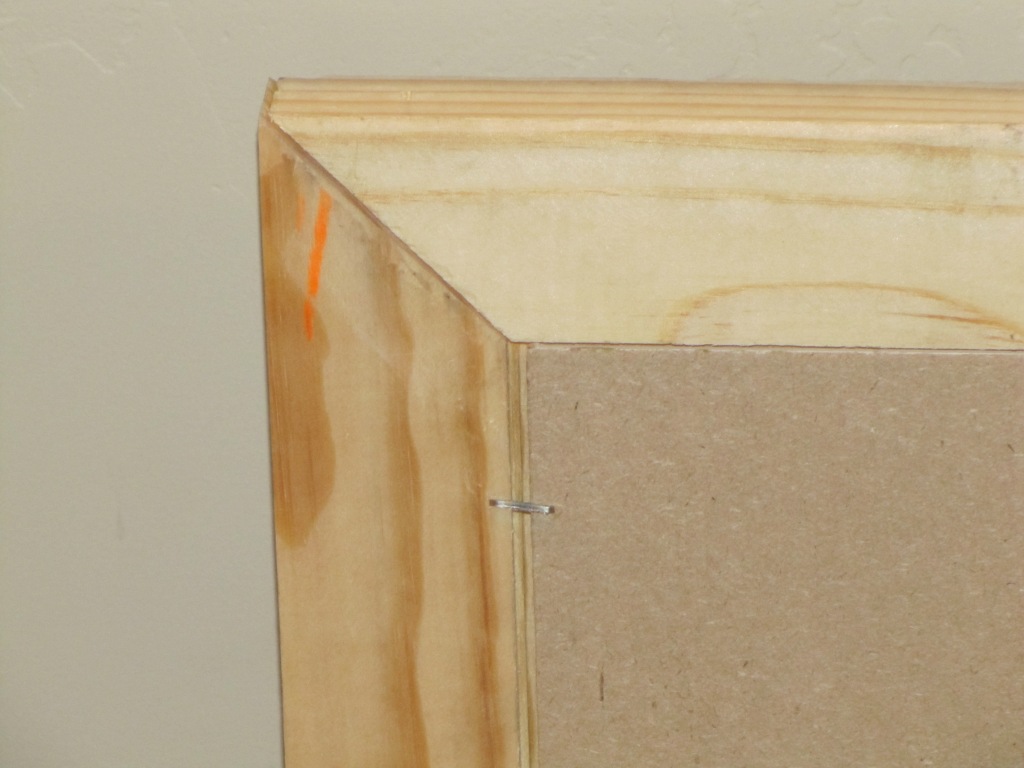
The step I am going to show you is called Mortise. I used the table saw to do it and it was actually SUPER easy.  Mortise is cutting a notch out of the frame so that the bead board sits in the frame and it will hang flush against the wall. I'm sure its do-able without a table saw, but I have no idea how to do it, so I would suggest googling it :)

Sorry for the blurry pic, put it shows you the Mortise cut.  Here's how you do it: First you measure the thickness of your bead board and that's how deep you will cut into the boards.  My bead board is 1/4" inch and since I want the square to be 24" I cut 3/4" the other way. Now that the Mortise is cut it's time to assemble.

**** IF YOU CHOOSE TO NOT DO THE MORTISE YOU WILL ASSEMBLE THE FRAME  ACCORDING TO THE DIRECTIONS BELOW AND THEN JUST STAPLE THE BEAD BOARD RIGHT TO THE BACK OF THE FRAME ****

I used a bit of wood glue to attach the corners then shot a nail on each side using my electric nail gun.  If you don't have a nail gun, finishing nails and a hammer would work great. Now it's time to let the glue dry. Normally I would wait an hour or so but since my dad was overseeing, and we were doing it correctly, I let 'er dry over night.  I was so excited to wake up the next morning and finish it!!

Attaching the bead board to the frame was super easy.  I chose not to use glue so the wood could expand and retract if necessary with weather changes or whatever. I used the electric staple gun, SOOO much easier than the old fashioned staple guns, and stuck a few staples in her and called it good. I used some wood filler on one of the corners and to fill in the nail holes.


Hooks

Now it's time to paint her up!! I used a flat black spray paint and once it was dry, I took my sand paper to the edges to show the wood and then sprayed a matte finish to seal everything in. I attached the hooks on the bottom using the screws they came with.  I think this would be just as cute without them though, and it would save you about $6.00!!

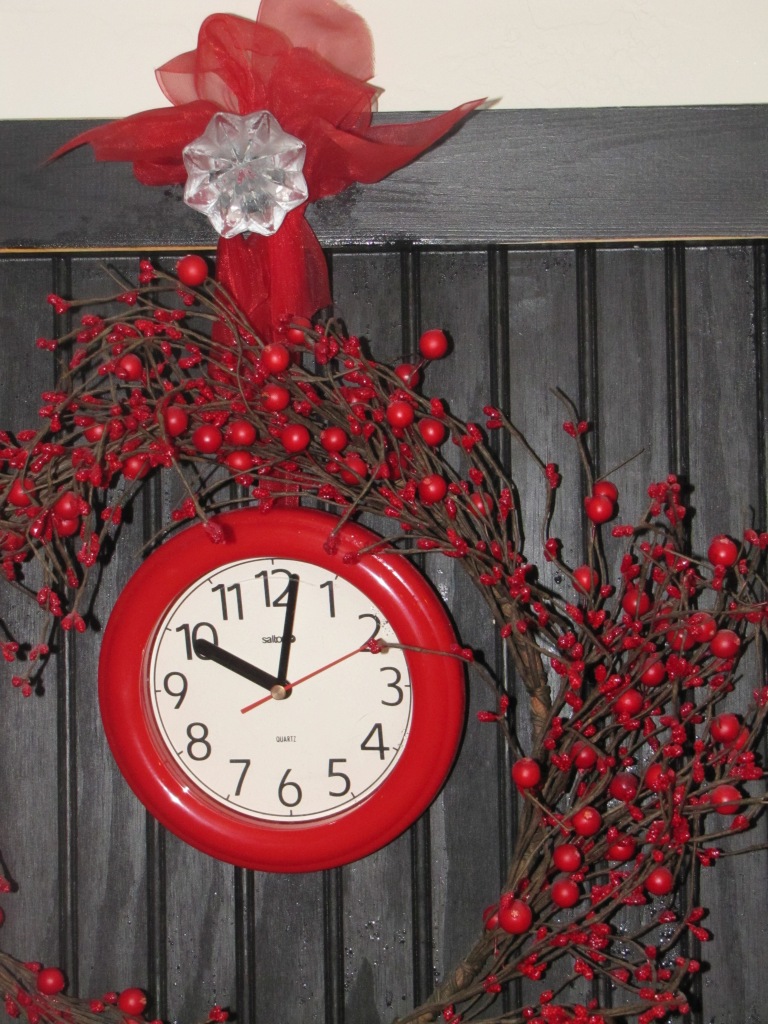
Here is a closeup shot of the knob and wreath ... I LOVE THE KNOB!!

Ok ladies, she's all done and from start to finish (not counting drying time) she took me about an hour. And the price is even better ... you ready??!!

$9.95 for the bead board

$6.00 for the hooks

$2.00 for the 1 x 3

$3.00 clock

Wreath, free since I already had it

Paint and sand paper free, already had them

FOR A GRAND TOTAL OF (DRUMROLL PLEASE) .... $20.95!!!! woo-hoo!! And remember that without the hooks it would only be $15.00 DANG I LOVE CHEAP STUFF THAT LOOKS TONS MORE EXPENSIVE!!!!!

And you know that I'm linking this up to my favorite parties ...

The Girl Creative

Making

The DIY Show Off

Sumo Sweet Stuff


DIY Day @ ASPTL